If you've seen some of my other posts then you know of my fascination with Tom Loving's "Gerbubble Bug". It's a square head bass popper that Mr. Loving invented nearly 100 years ago, and it was my go to popper for much of my early years in fly fishing for bass... in fact, it was the inspiration for my "Zudbubbler" foam popper.
The Gerbubble Bug still holds a special place in my heart and I recently decided to make some for display purposes. Oh, they will surely catch fish as well as they did when I was younger, but nowadays I rarely fish them and the Zudbubbler takes most of the hits.
I do sometimes get into a nostaligic mood and will bring out the GB to get a few fish just for kicks, although the idea of a toothy critter stealing one is something that usually keeps them tucked away safely.
In this tutorial I will show you how I make them. Although I believe most of the steps are true to how Mr. Loving made them I have taken liberty to use a few modern materials that work much better (in my opinion) than what was available in days gone by.
I believe I also read that Mr. Loving's Gerbubble Bug was originally made of cork, but he later began using balsa wood as it created a nicer looking finish. I will also be using balsa for the same reason.
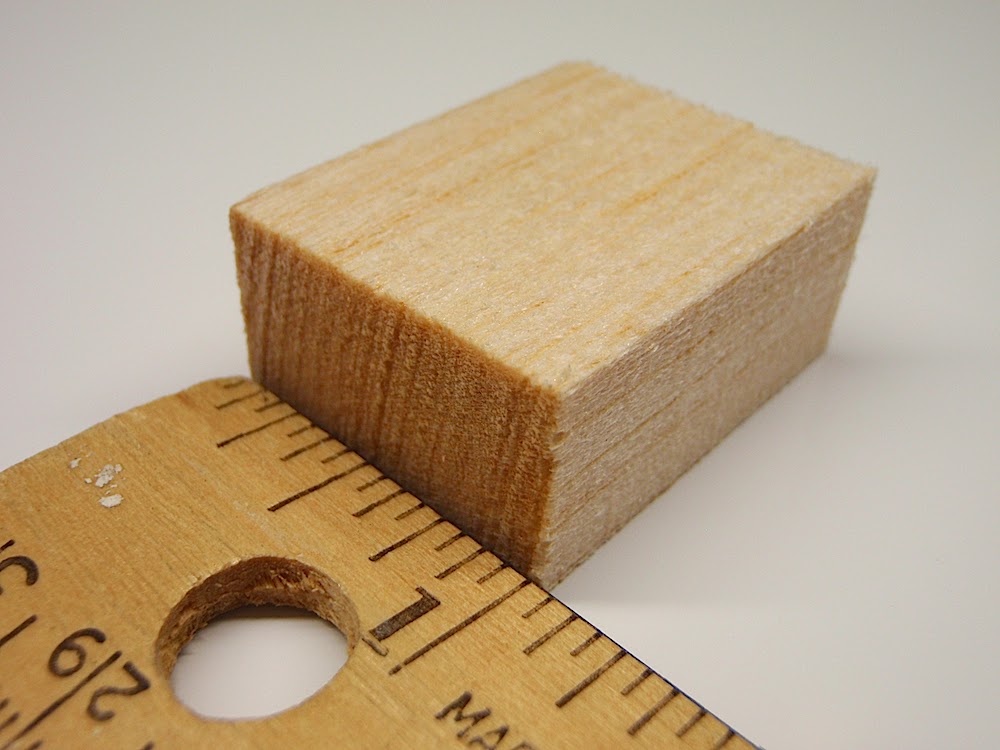
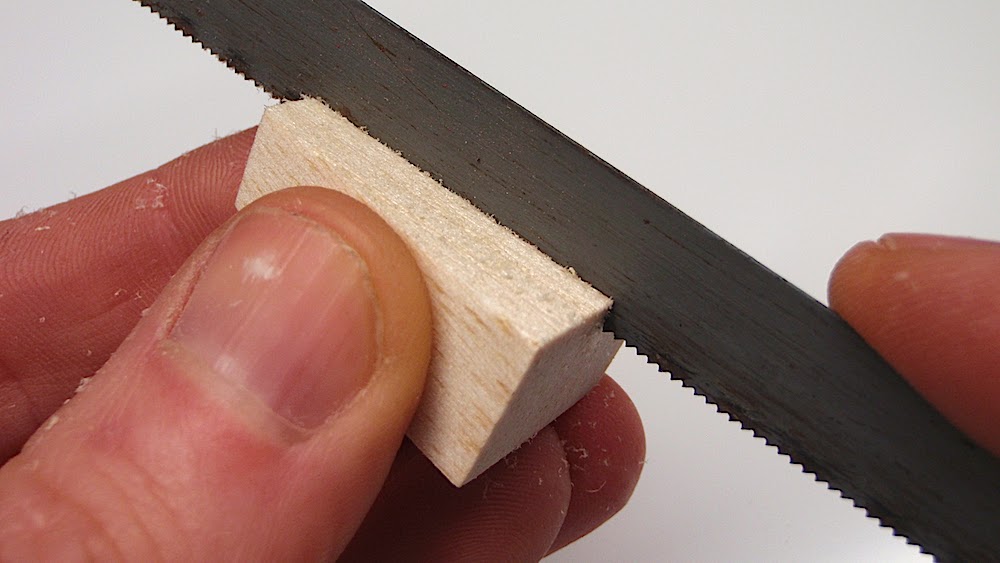
Step 1: I typically begin with a 9/16" tall x 1" wide piece of balsa and cut it to a grain length of 1 1/4".
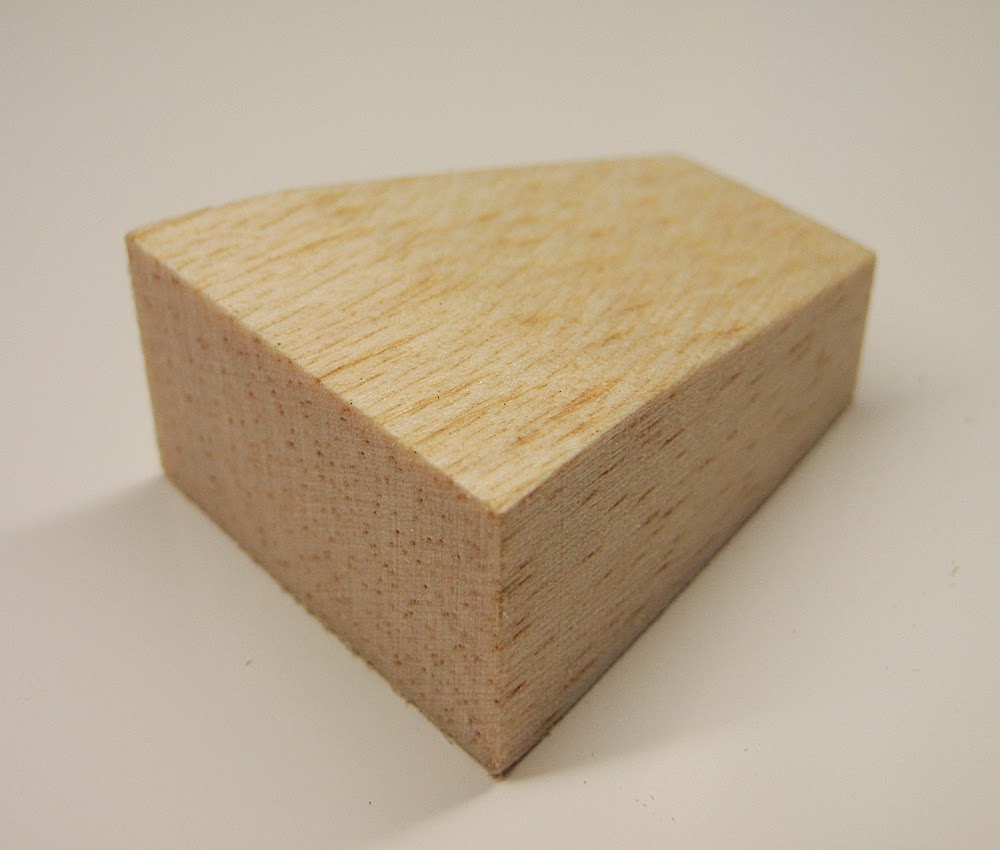
Step 2: Sand the block so it tapers on the top and sides, leaving the bottom un-sanded. I typically use my power disc sander for this step but you can easily use a hand sander as shown above.
Step 3: When finished sanding, your block should look similar to this. Size is not as crucial as you may think, but this particular body tapers down to a measurement of 3/8" tall x 1/2" wide at the rear.
Step 4: Using a hacksaw blade, cut a grain length groove on the bottom of the block. keeping it as centered as possible at the front and rear so it will track straight when casting. I typically make the groove about twice the wire depth of the hook I'm using.
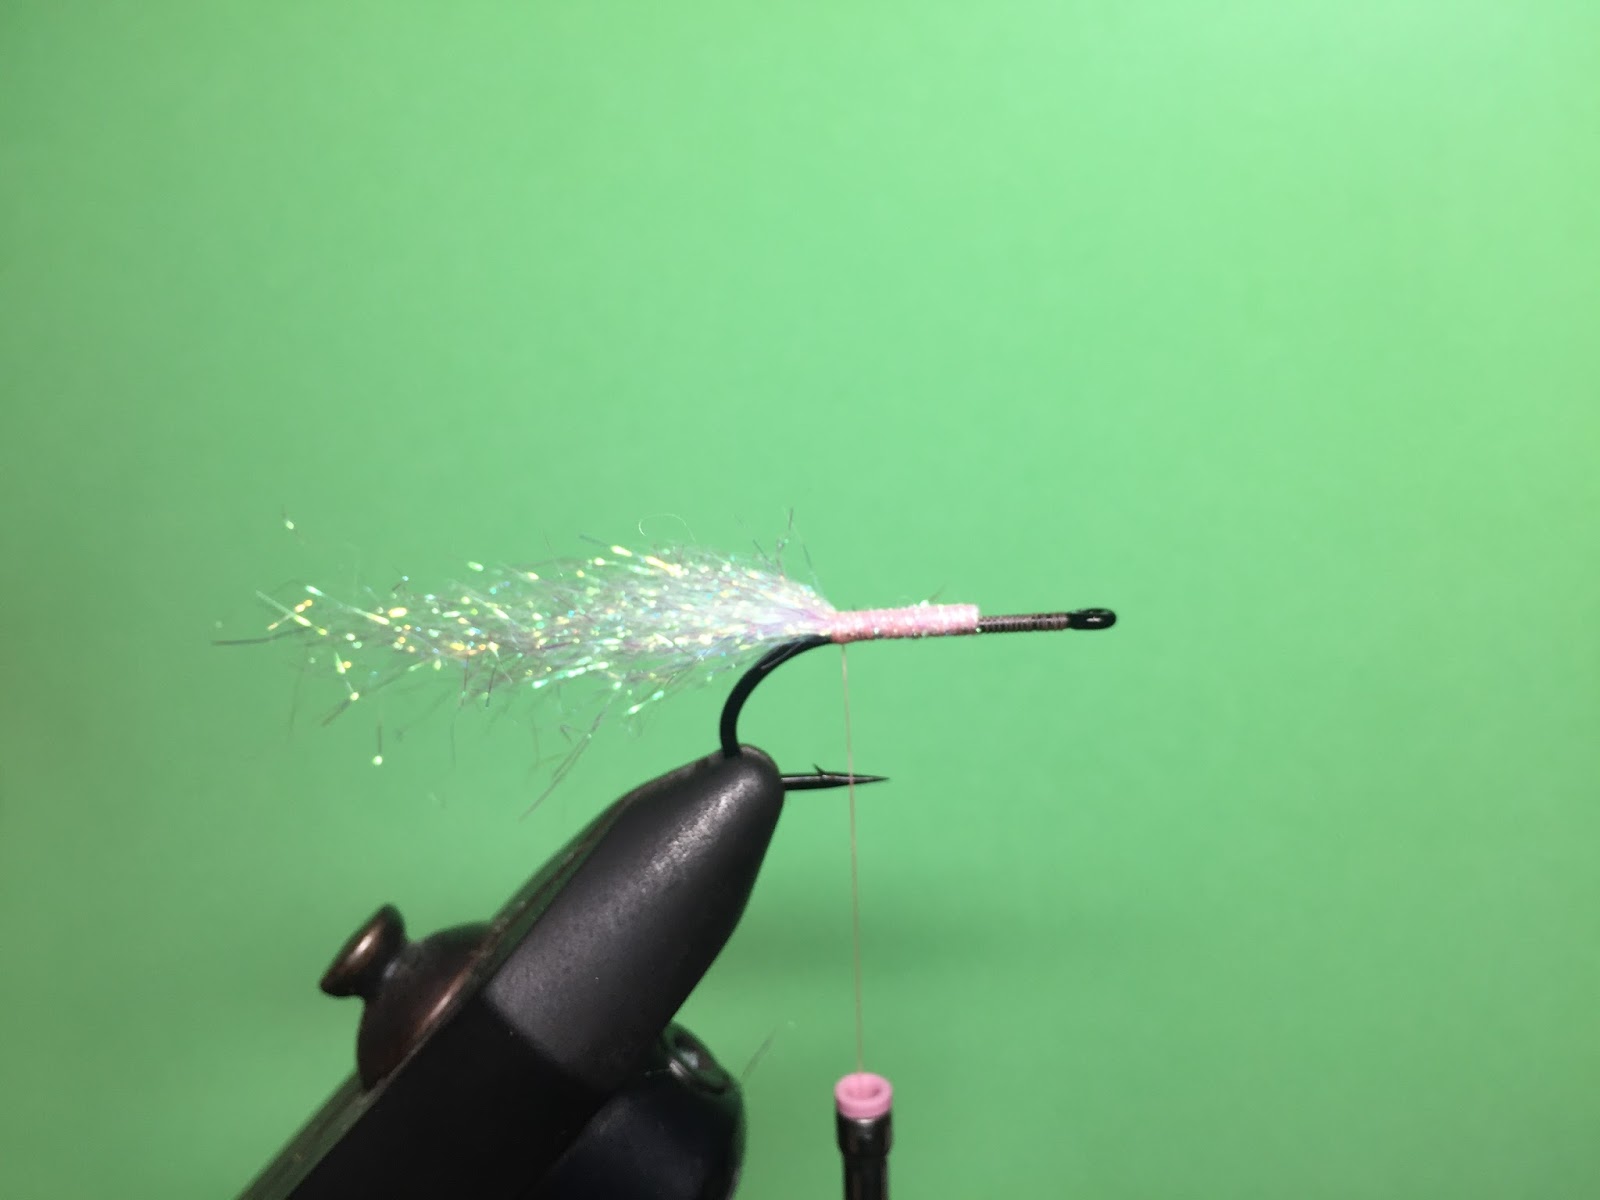
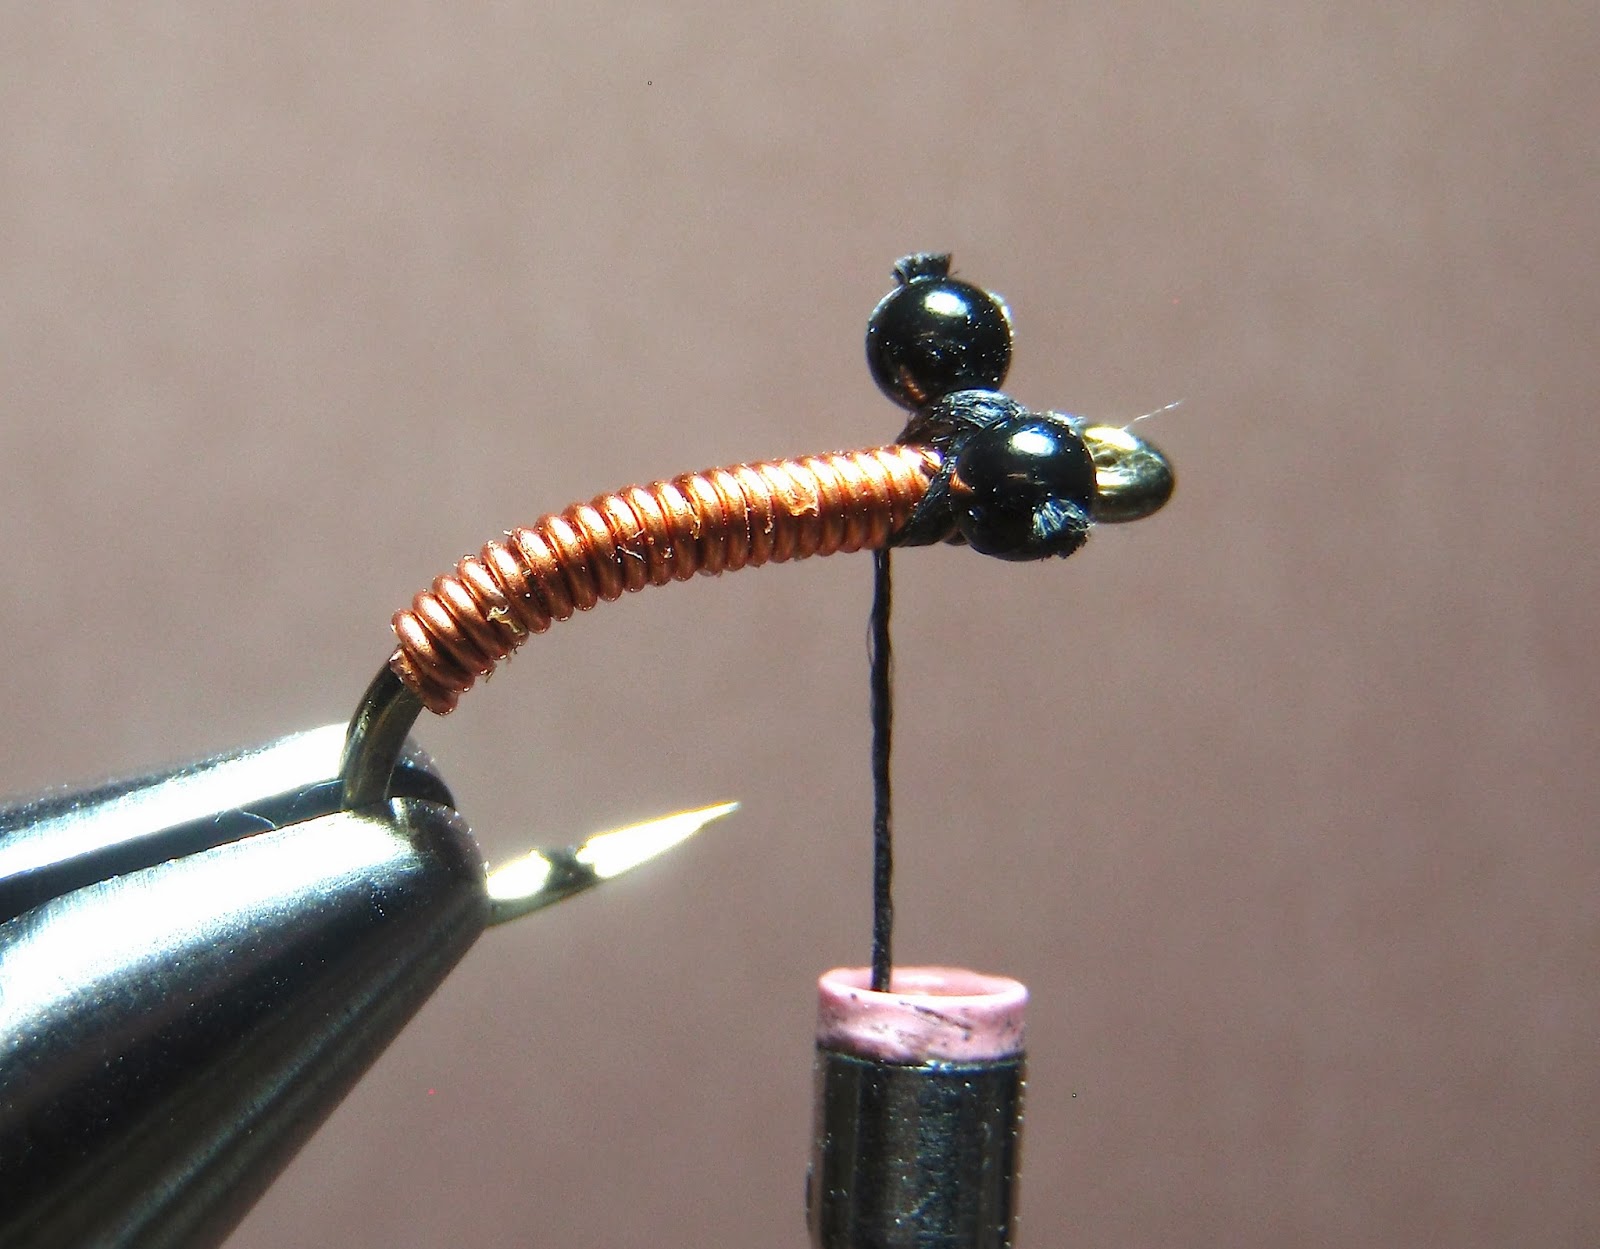
Step 5: Choose an appropriate hook. Many will work, but for this popper I have choosen a TMC 202SP Spey hook Size 1/0. Wrap the hook with a thread that will absorb the epoxy, I like Ultrathread 3/0. Once the thread is wrapped and tied off, mix up some 5 minute epoxy, coat the wraps and insert the hook into the groove. Make sure your hook is lined up straight with the balsa block and then fill in the remainer of the groove with more epoxy. Allow to dry.
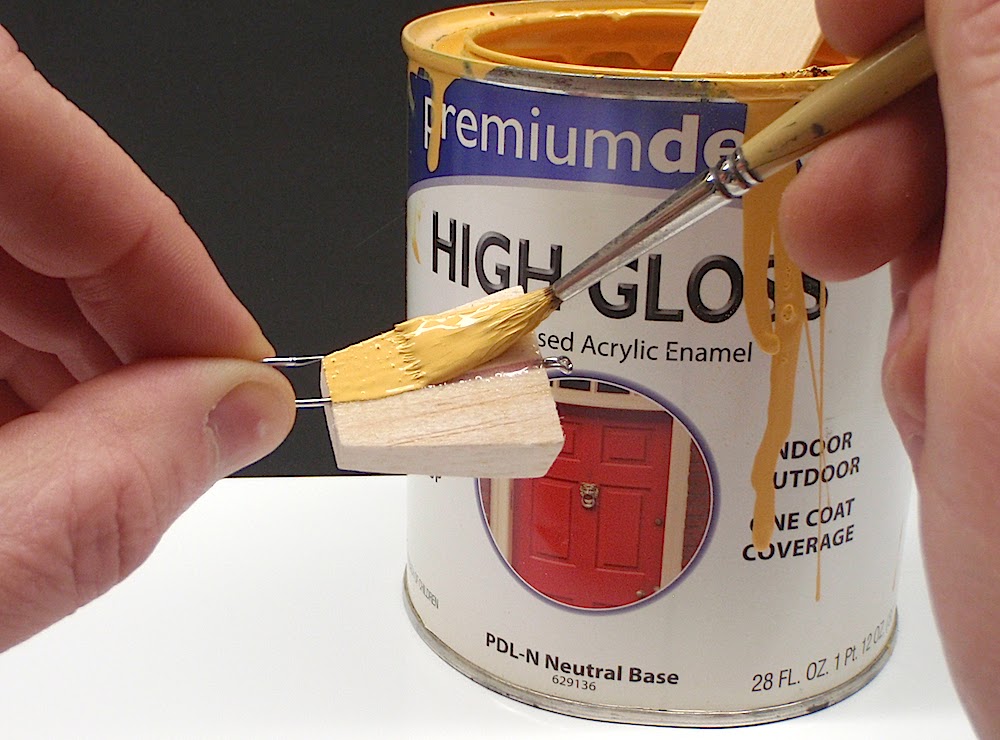
Step 6: Paint the balsa. I typically brush one solid coat, let it dry, sand it with a fine grit sanding sponge and then paint a final solid coat. You can use whatever type of paint you wish here. I use a waterborne enamel because it's easy to clean up, durable and I have a bunch of it. No need for a primer either.
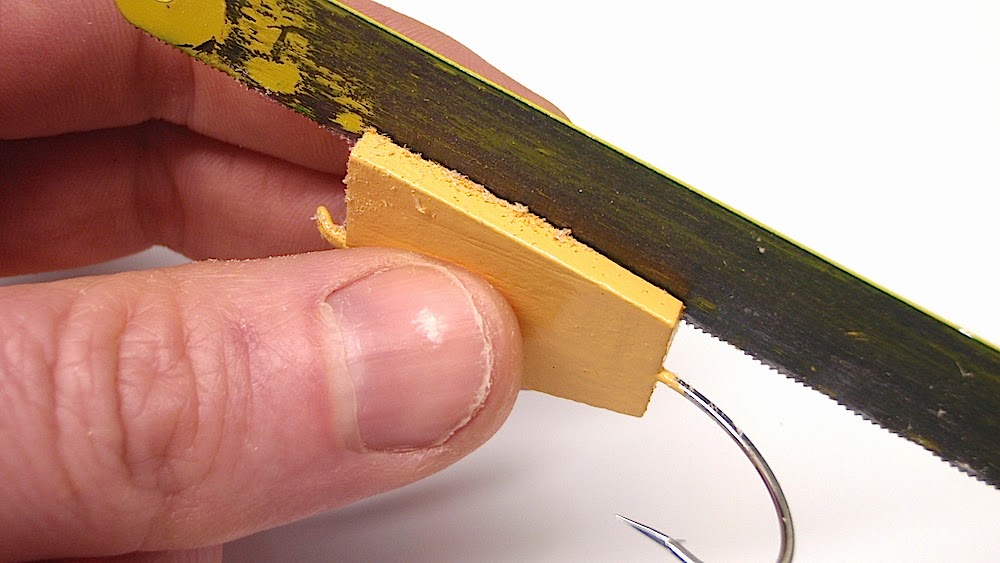
Step 7: Using a hacksaw blade, saw a groove about 1/8" deep along each side of the balsa. I usually keep it about an 1/8" up from the bottom as well.
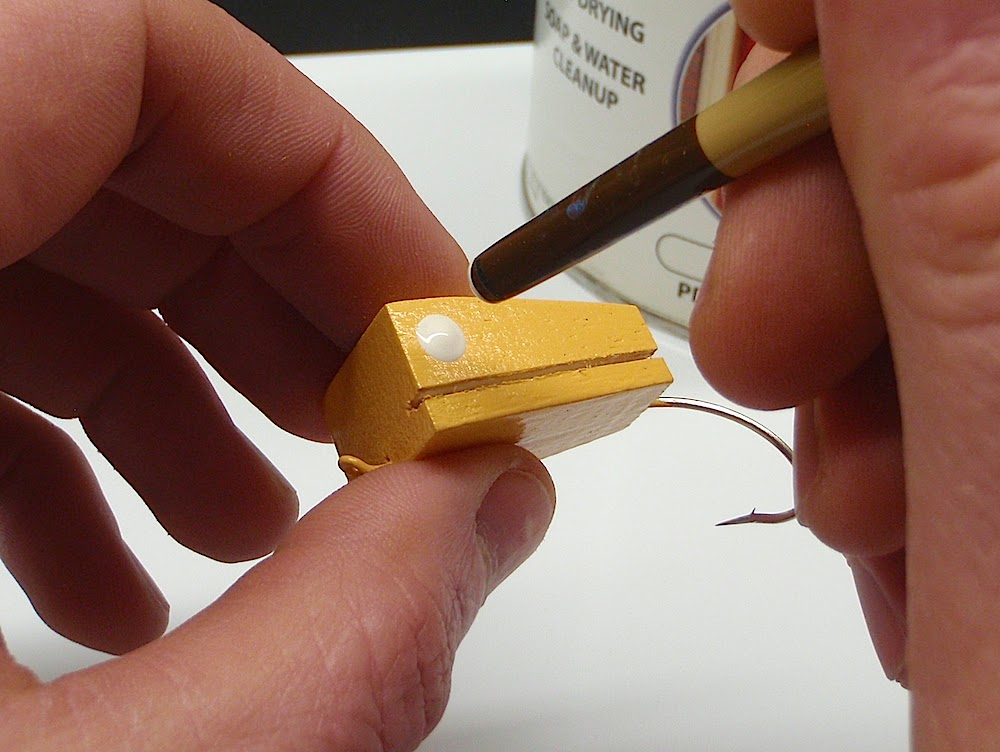
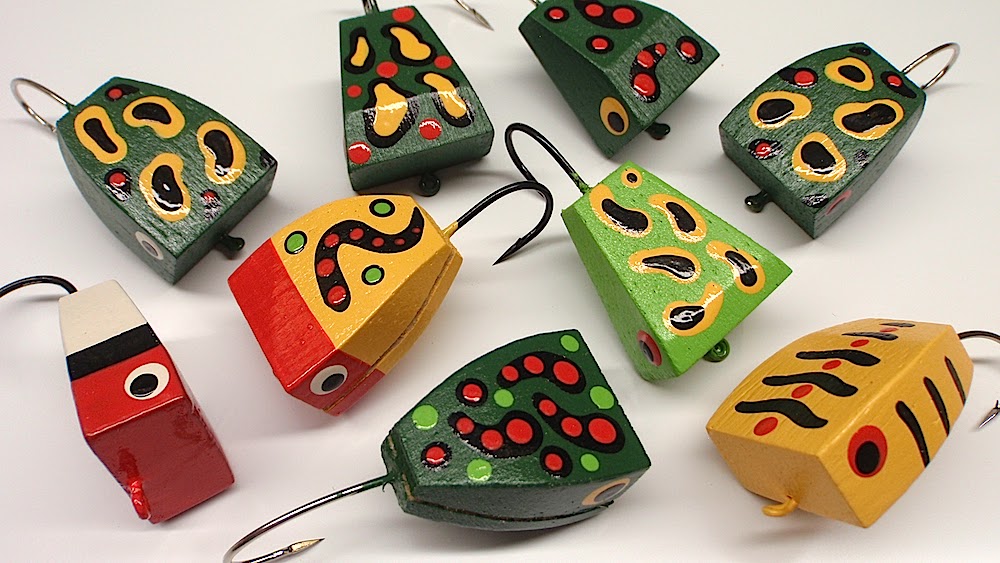
Step 8: Dipping a round object such as the end of a paint brush in the paint and simply pressing it to the popper body is a great way to get a perfectly round eye. Wait until the paint dries, then add a smaller dot using black for great looking eyeballs.
Step 9: Here's where things get fun for me. Getting creative with paint! The round end of the brush handle also works great for perfectly round spots... or simply move it around a little for realistic frog spots. Fine tipped brushes work great for detail work. Have fun and be creative on this step!
Step 10: With the paint completely dry, the popper finally reaches the vise. I've switched my thread to 6/0 Uni-thread... the thinner diameter of 6/0 will make for a cleaner tie off a few steps later. Tie in a tail material of your choosing. There are numerous possibilities here as well, but I've chosen a clump of dyed black bear fur. Some other options include marabou, buck tail, craft fur etc.
Step 11: I like to add some grizzly hackle feathers for legs. Rubber or silcone legs are a great option here as well.
Step 12: Add a hackle feather of your choice and tie off with a few half hitches. For hackle, I prefer a long webby Schlappen feather in a contrasting color. Also, after I tie in the hackle feather by the tip, I wind some dubbing around the hook and palmer the hackle feather through it (like I do on the Zudbubbler tutorial) as this helps the hackle to splay out better. Don't bother trying to whip finish over the bulky balsa head unless you're a pro at doing it by hand... a few half hitches are all that's needed, and a half hitch is much easier to do over the large popper head.
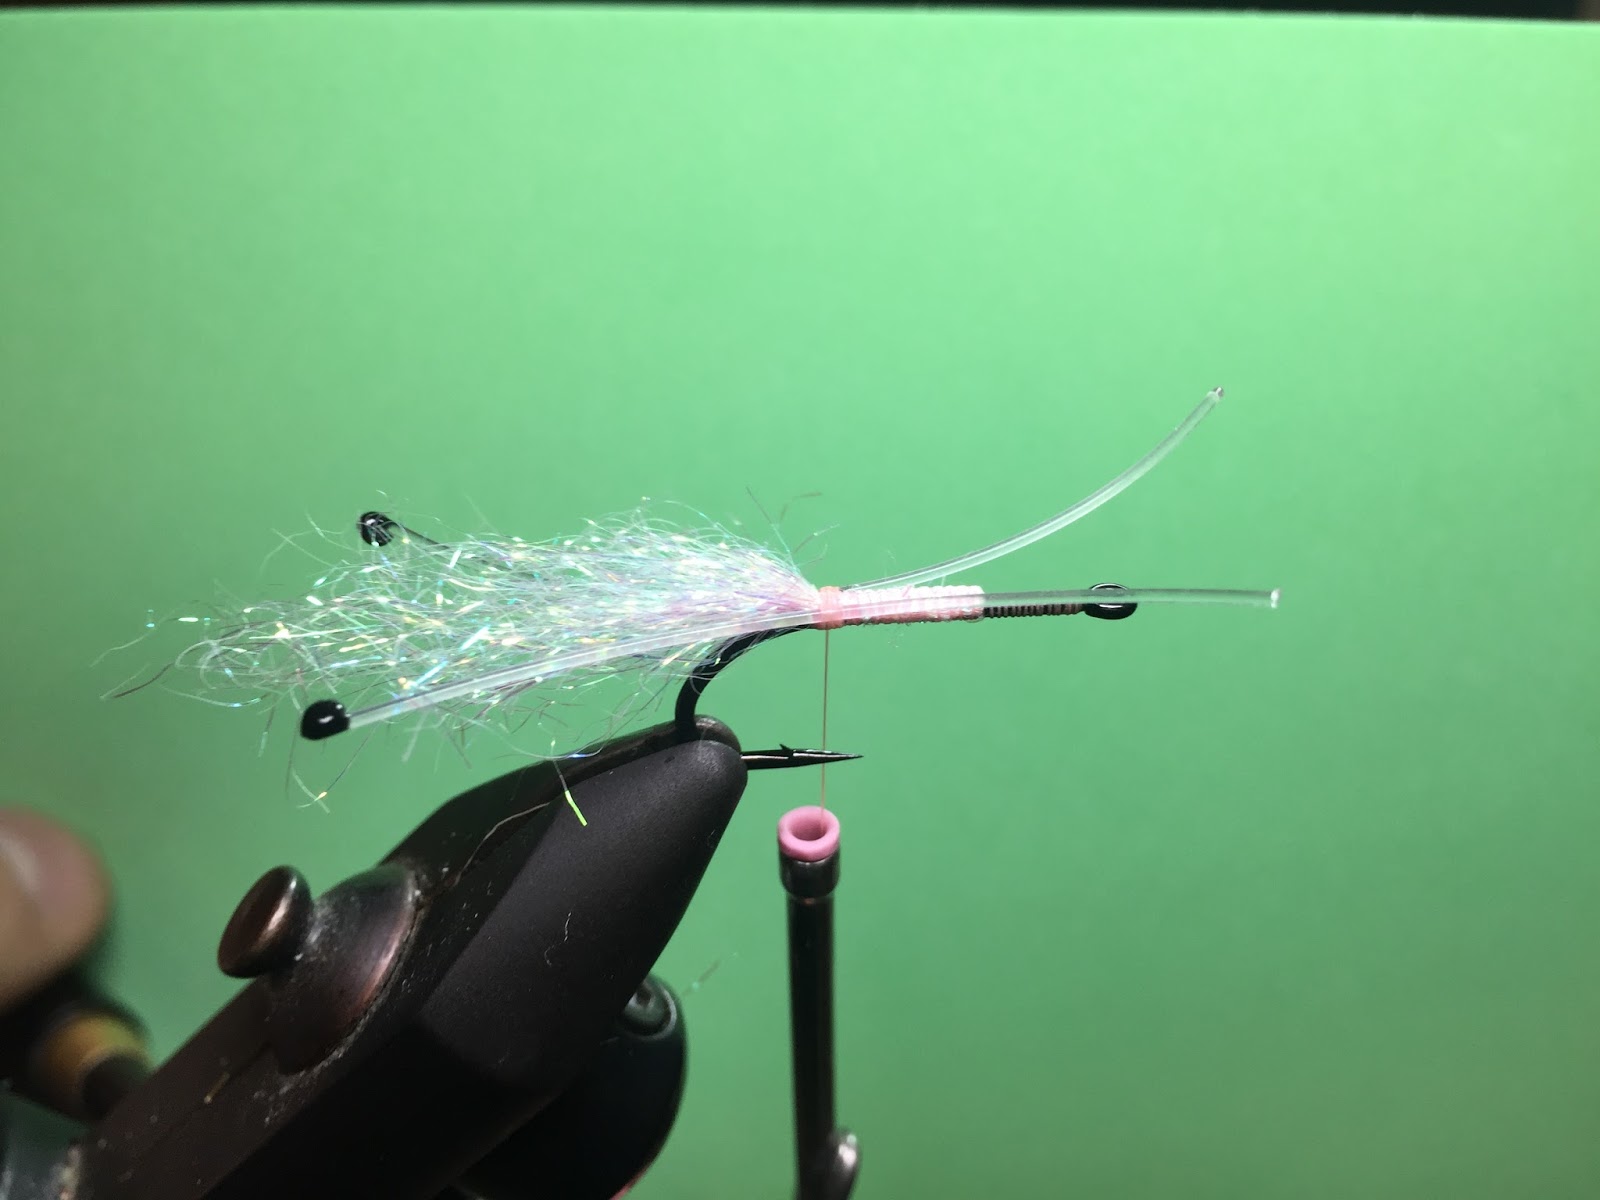
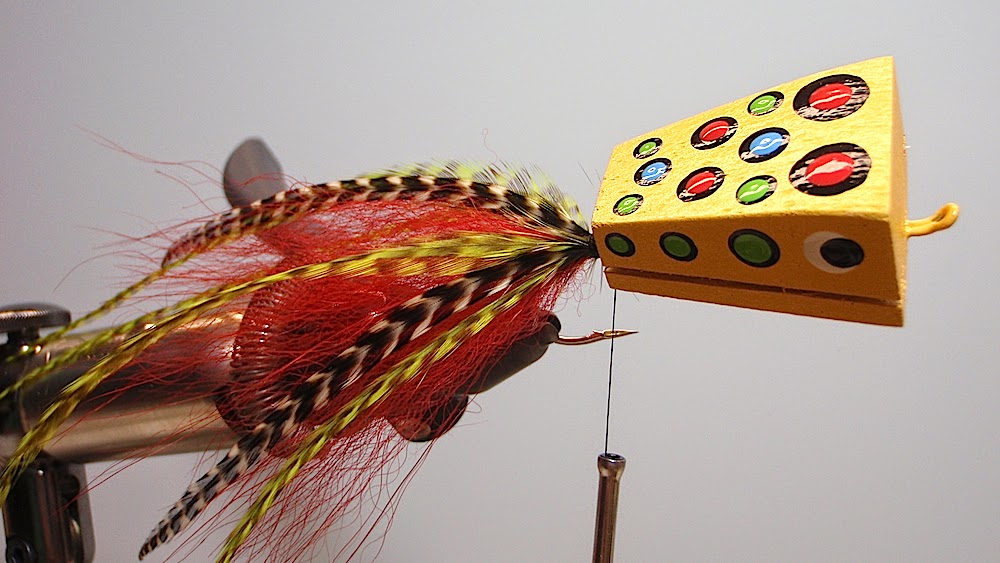
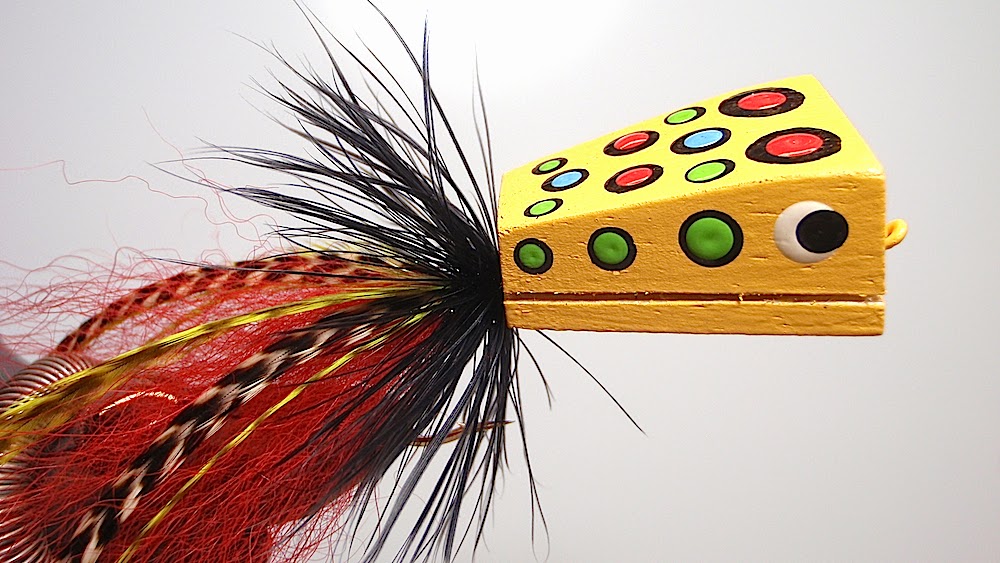
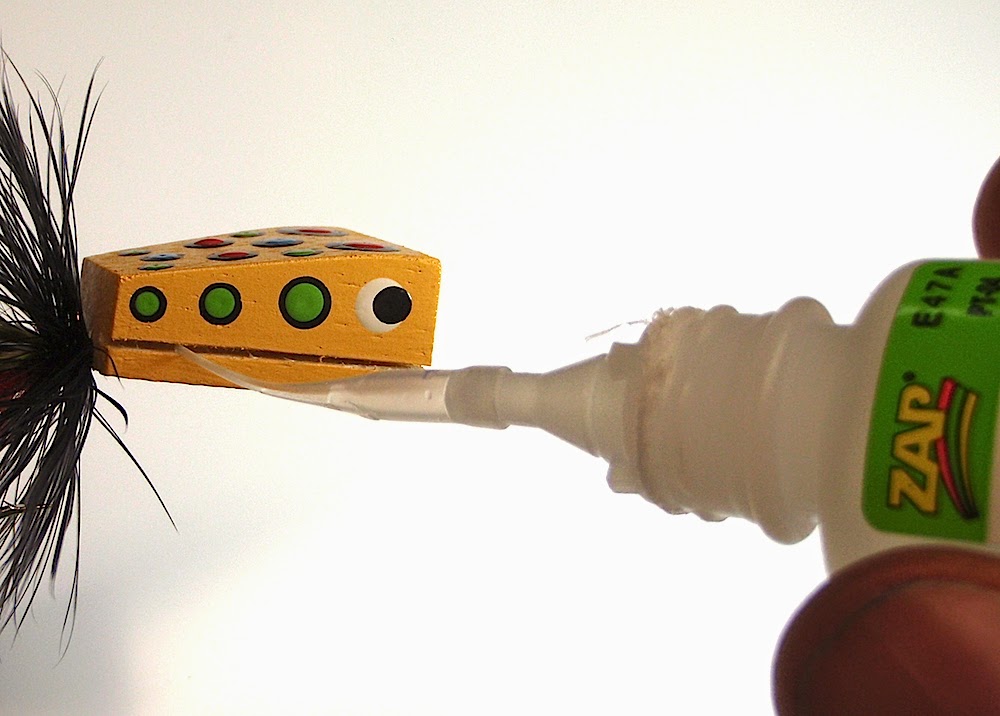
Step 13: Using a fine tipped bottle, squirt some Zap-a-Gap into the entire groove along the side of the body.
Step 14: Here's another step where you can be creative. Originally this step called for a hackle feather. I frequently use schlappen, guinea and mallard flank but one of my new favorite substitutes is Enrico Puglisi's EP Foxy Brush in the 3" wide version. In any case, fold it in half, insert it all the way back into the groove and allow the glue to dry for a few minutes before trimming off the excess in the front and back. Repeat this step on the other side of the popper as well.
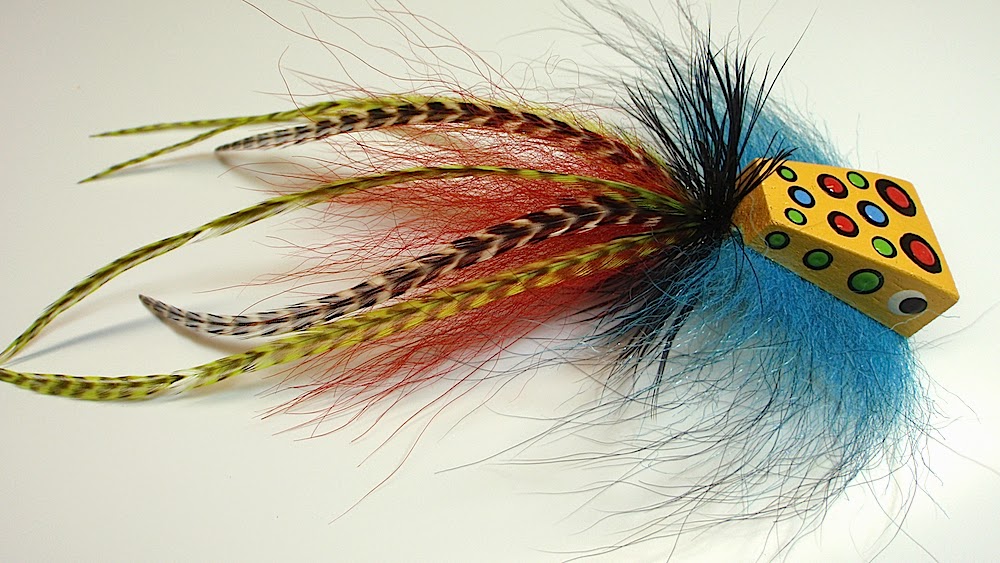
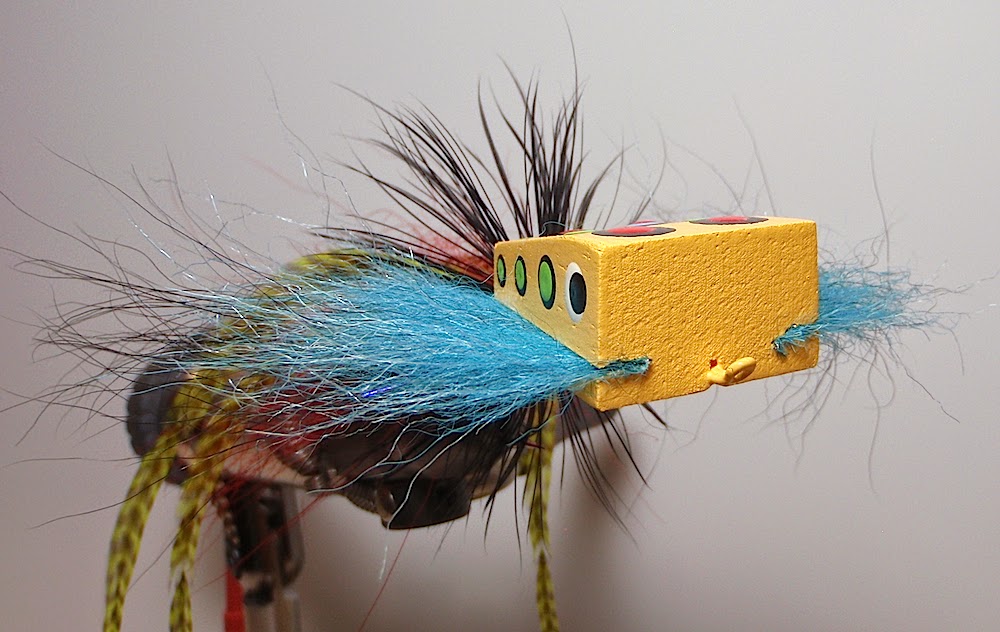
Here are some photo's of this fly when completed. As you can see, I also sponge painted some white on the bottom of the body to add texture.
I hope you enjoyed this tutorial. I would love to see some of your creations! Feel free to friend me on Facebook and tag me in your Gerbubble Bug photo's so I can check them out. Thanks! - Matt "Z" Zudweg.
Captain Matt "Z" Zudweg guides on Michigan's Muskegon River, specializing in swung fly steelhead and top water bass. Visit his website at
www.zflyfishing.com